Devices & Groups
Accessing Device Group Pages#
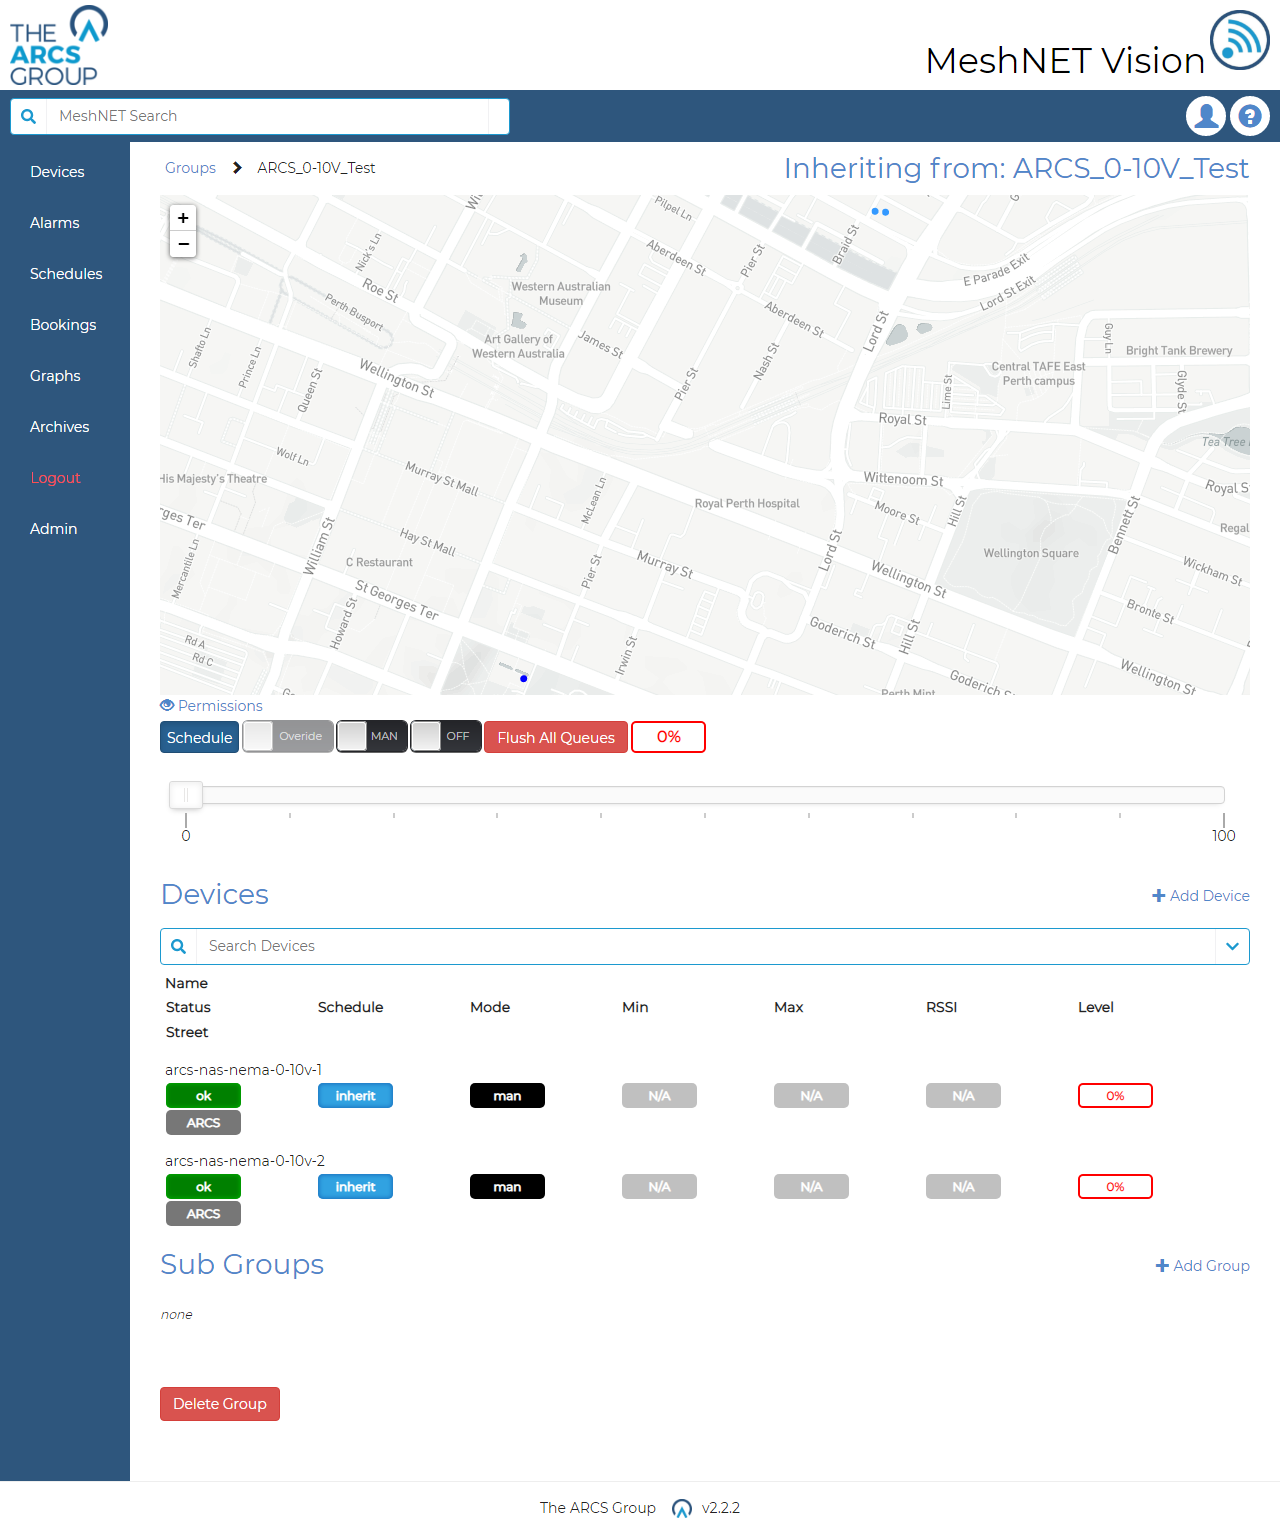
Selecting one of the groups seen in Figure 2 will take users to the related group page which contains all the devices and subgroups contained in that group. Figure 13 shows a screen shot of the smart light group control page for ARCS_0-10V Test.
Sub Groups#
3.3 SUB GROUPS Below this control panel in Figure 13 we see the groups subgroups list and these subgroup’s current command and control modes. Clicking these groups will take the user to the subgroup’s page with a similar layout to the page seen in Figure 13.
Adding Sub Groups#
To the right in group pages (example Figure 13) users will see a "+ Add Group" link that allows users to assign a new sub group to the group with a new ID (see Figure 15). Sub groups are restricted to a certain depth to prevent too much segregation and confusion. This depth can be altered on the settings page (see Figure 16). Groups at this max depth will have no sub group lists on their page and no ability to have sub groups added to them (see 11.1 for more detail).
Device Pages#
Below the subgroup list in Figure 13 we see the group's device list. This provides an overview of the group's device's key information. Clicking a device will take users to that device’s page showing the most recent information received from the device and device own control panels. The contents of these device pages vary depending on the device type and are explained further in the device specific sections. An example of device page for a DALI supported smart light can be seen in Figure 14.
Adding Devices to Groups#
To the right of this device list on a group page (example Figure 13) users will also see a link marked "+ Add Device" which allows them to add new devices to the groups via the form seen in Figure 16. In adding a new device users must specifiy:
- The devices ID. This will be unique throughout the system, users will be able to search for the device by this ID and all graphs and pages will use this ID to identif y a device.
- The device’s brand. The brand of device that is being installed. This differs per device type.
- The device’s product type. The product from the selected company brand that is being installed.
- Serial number of the device.
- Site, area and location. With site being the most specific descriptor followed by area then location. For example site may be a street, area may be a suburb and location may be an area.
- Longitude and latitude. The GPS location of the device. If the device reports GPS location enter the original location of the device.
- Device specific fields. These include mounting types and protocols and differ per device type.
- Application links. The links to the systems network application. Users must specifiy the devices appliocation ID within the applications network system. For example for TTN applications this is the ID of the device as seen in the TTN console. Application and application links will be explained further in section 7.
Inporting Devices#
Operators can also import multiple devices at once into groups using CSV files. To do this, navigate to the group’s page you wish to import devices into and click the “Add Device” link (see Figure 13). Users will see a form titled “Batch CSV Import” (see Figure 17). To import select the “Choose file” button and use the file manager to select your CSV file. If the CSV file contains a header row check the header checkbox. If not, uncheck it. Users must also select the separator used in the CSV file. A line preview is given to demonstrate the file structure that is required. This structure is the same as the add device from described in 3.1. This differs for each device type. The last columns in the schema are reserved for application connections. Users can define as many application connections as they wish by providing the application’s ID and device’s application ID (see 7). After the completing the above steps select “Import” to begin the device import. Users will be redirect to the page of the group they are importing into where they will see the newly added devices in the groups device list and on the group status map.

Deleting Devices and Groups#
To delete a device, users must navigate to the device’s page and select the Edit button in the top right corner of the page. Users will be directed to a page similar to the create device form (see Figure 16) but with the edit and delete the device. Users will see a red button labelled Delete. Selecting this, a modal will appear asking the user to confirm the device deletion. On confirming the deletion users will be redirected to the deleted devices parent group page where they will see the device is now absent from the groups device list.
To delete a device groups users must navigate to the page of the device group they wish to delete. At the bottom of the page users will see a red button labelled Delete Device. On selecting this users will be asked to confirm the deletion. On confirmation users will be redirected to the device group’s parent group page or if it was a root group the landing page. Warning deleting a device group will delete and all devices and sub groups within that group as well as any associated bookings and permission settings.